


how do you print those small photos?
my process, an alternative way, and a template

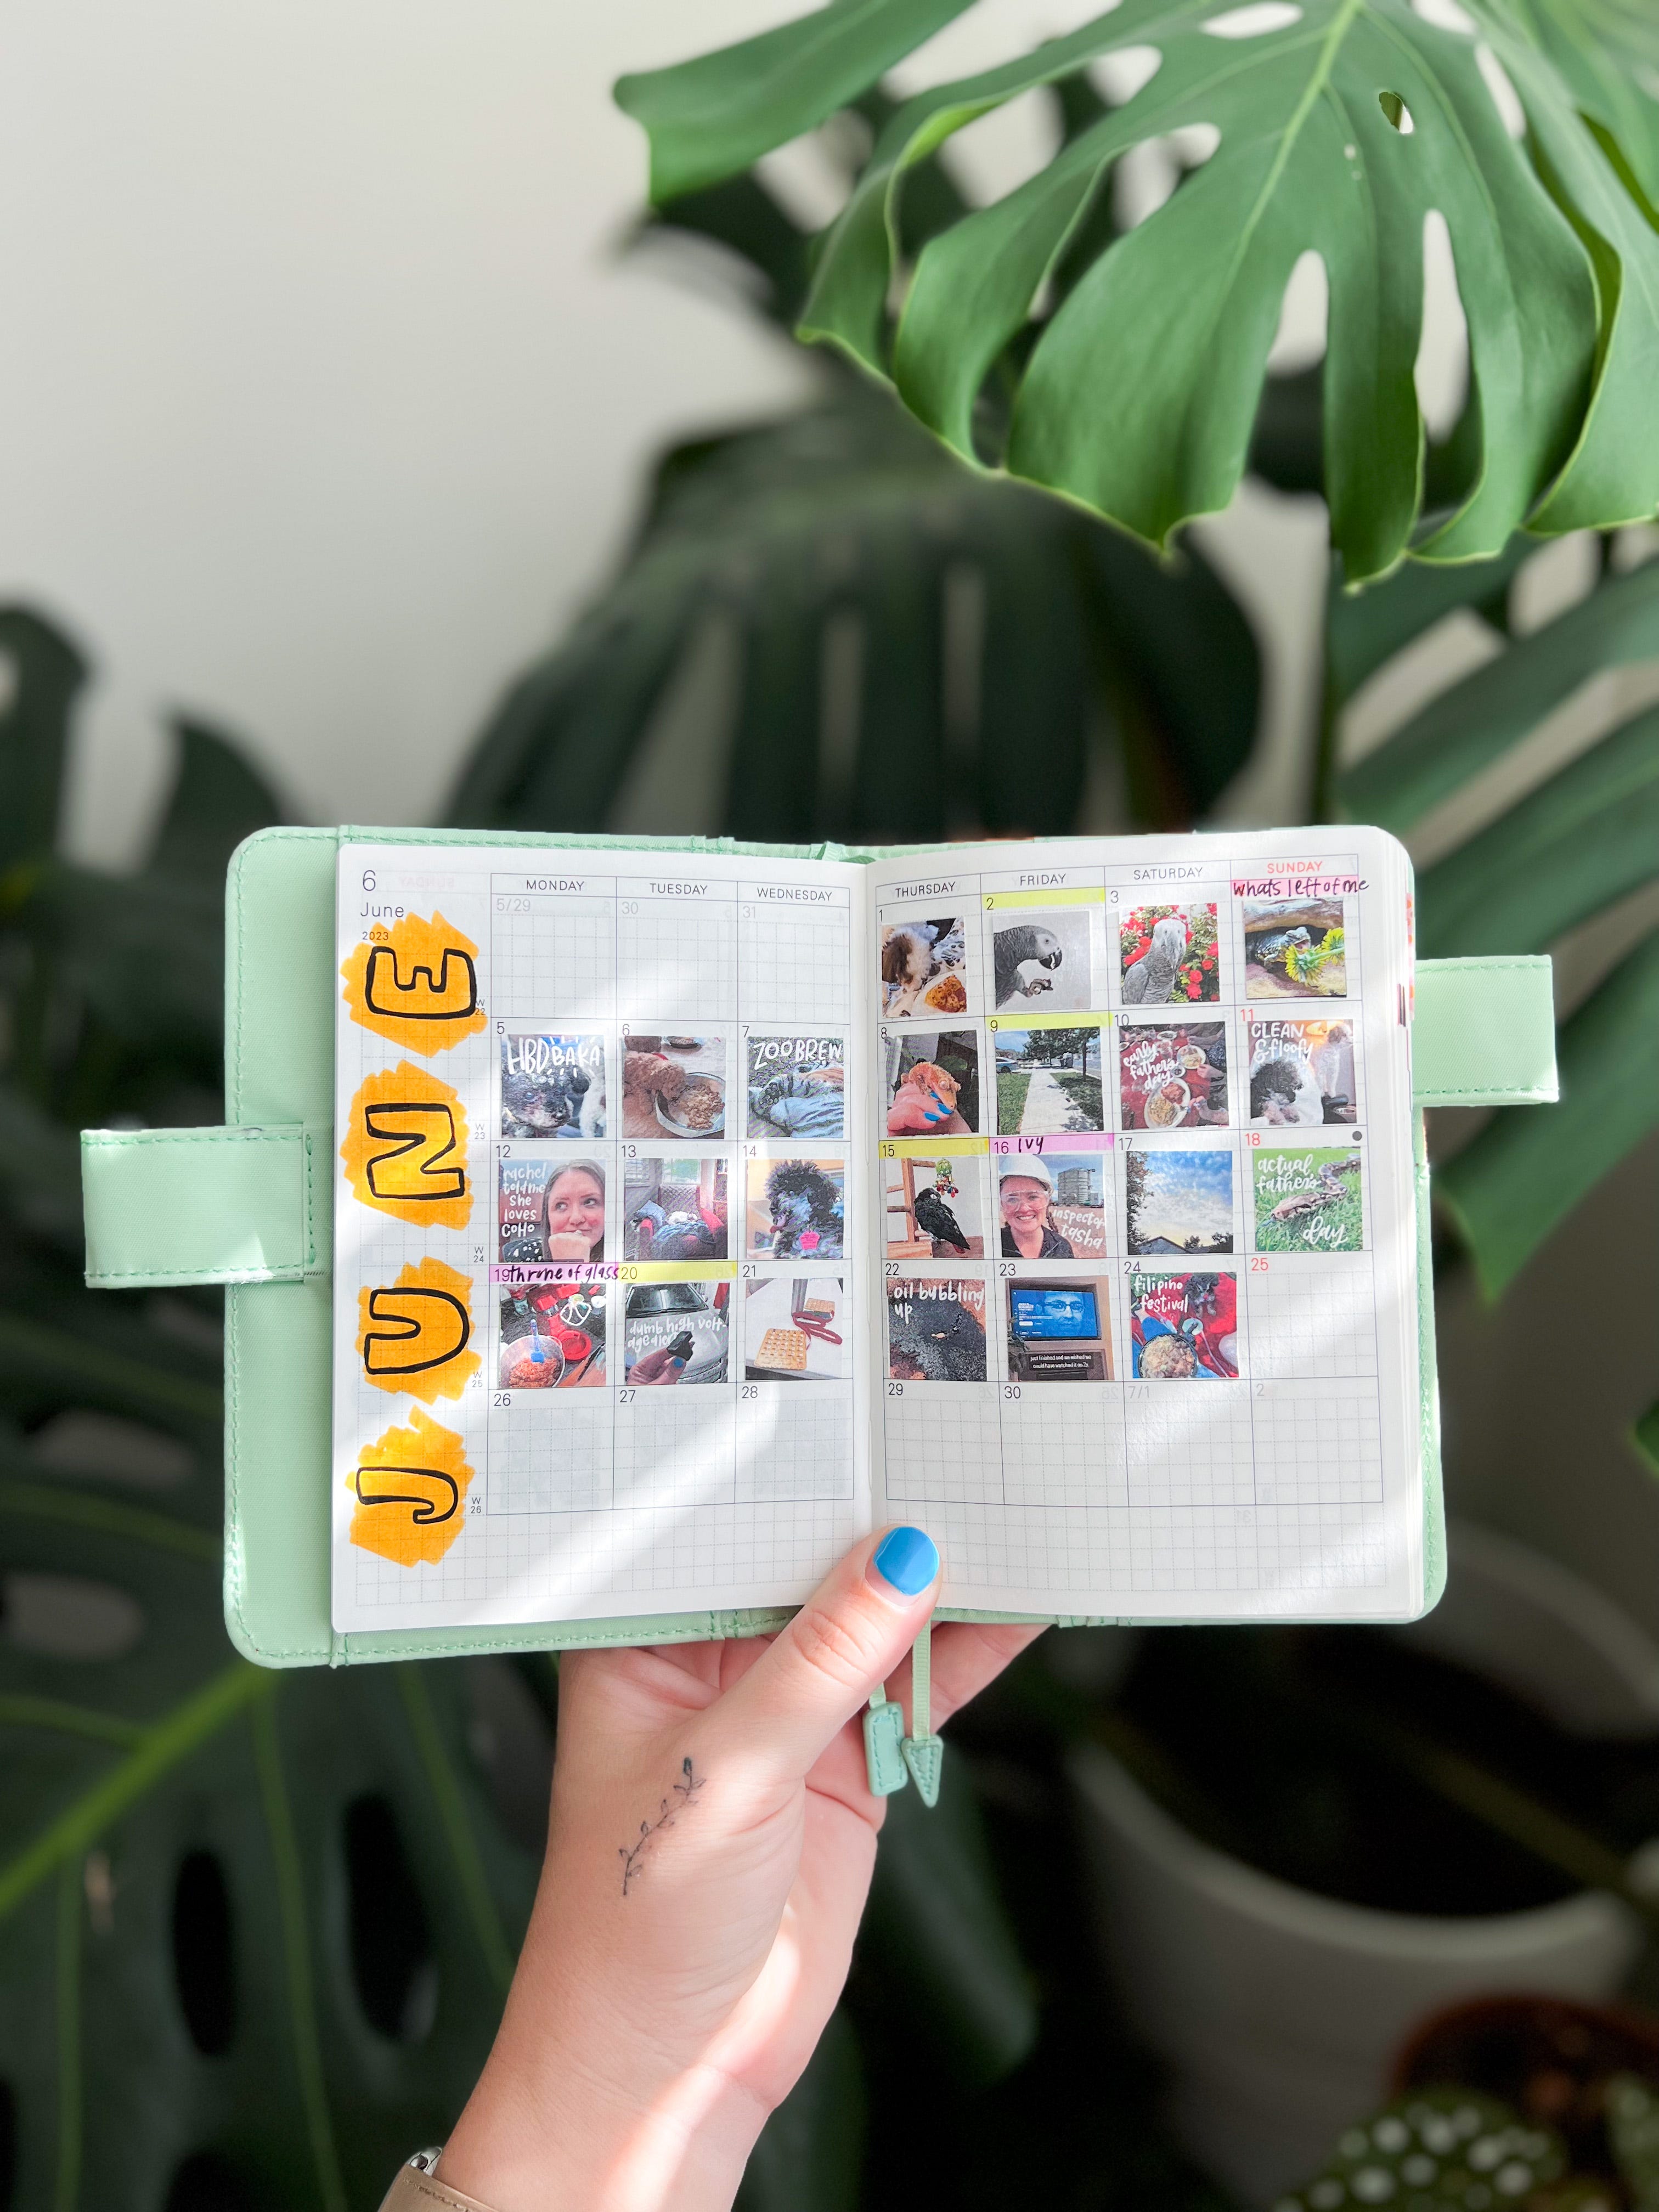
the question i get asked the most on instagram and tiktok is some variation of ‘how do you print those photos?’ at first, it was in reference to the book covers in my bullet journal and now it includes the small daily photos in my monthly hobonichi spread.
my old process:
i used to use shutterfly and would order photos monthly. if you order through the app, 4x4 and 4x6 photos are free and you pay for shipping, which for me was anywhere from $2-$5. i’d use the layout app and add 6 book covers to a square and print at the 4x4 size and cut down once i received them. if you have the space in your monthly spread, you could add 9 photos and have a 1.33” x 1.33” daily photo.
my new process:
my husband got me a laser jet color printer (this exact one - he ordered it through amazon) for my birthday in january and i’ve exclusively been using it for my photos, plus i prefer the lower gsm paper in my hobonichi. i know you can buy tomoe river paper, but i love using what i have before buying more supplies.
i have an original ipad pro from 2014, i think, so i use that and the procreate app to resize my photos and add little comments above.
procreate walkthrough:
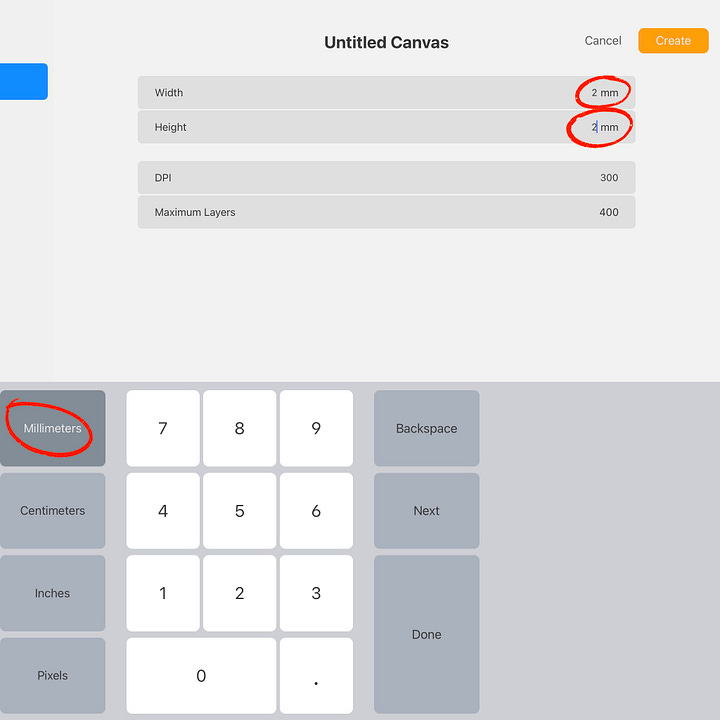
start by measuring the space of one day in your monthly spread (2.5mm x 2.5mm for an a6 hobonichi; i do 2mm so there’s extra space)
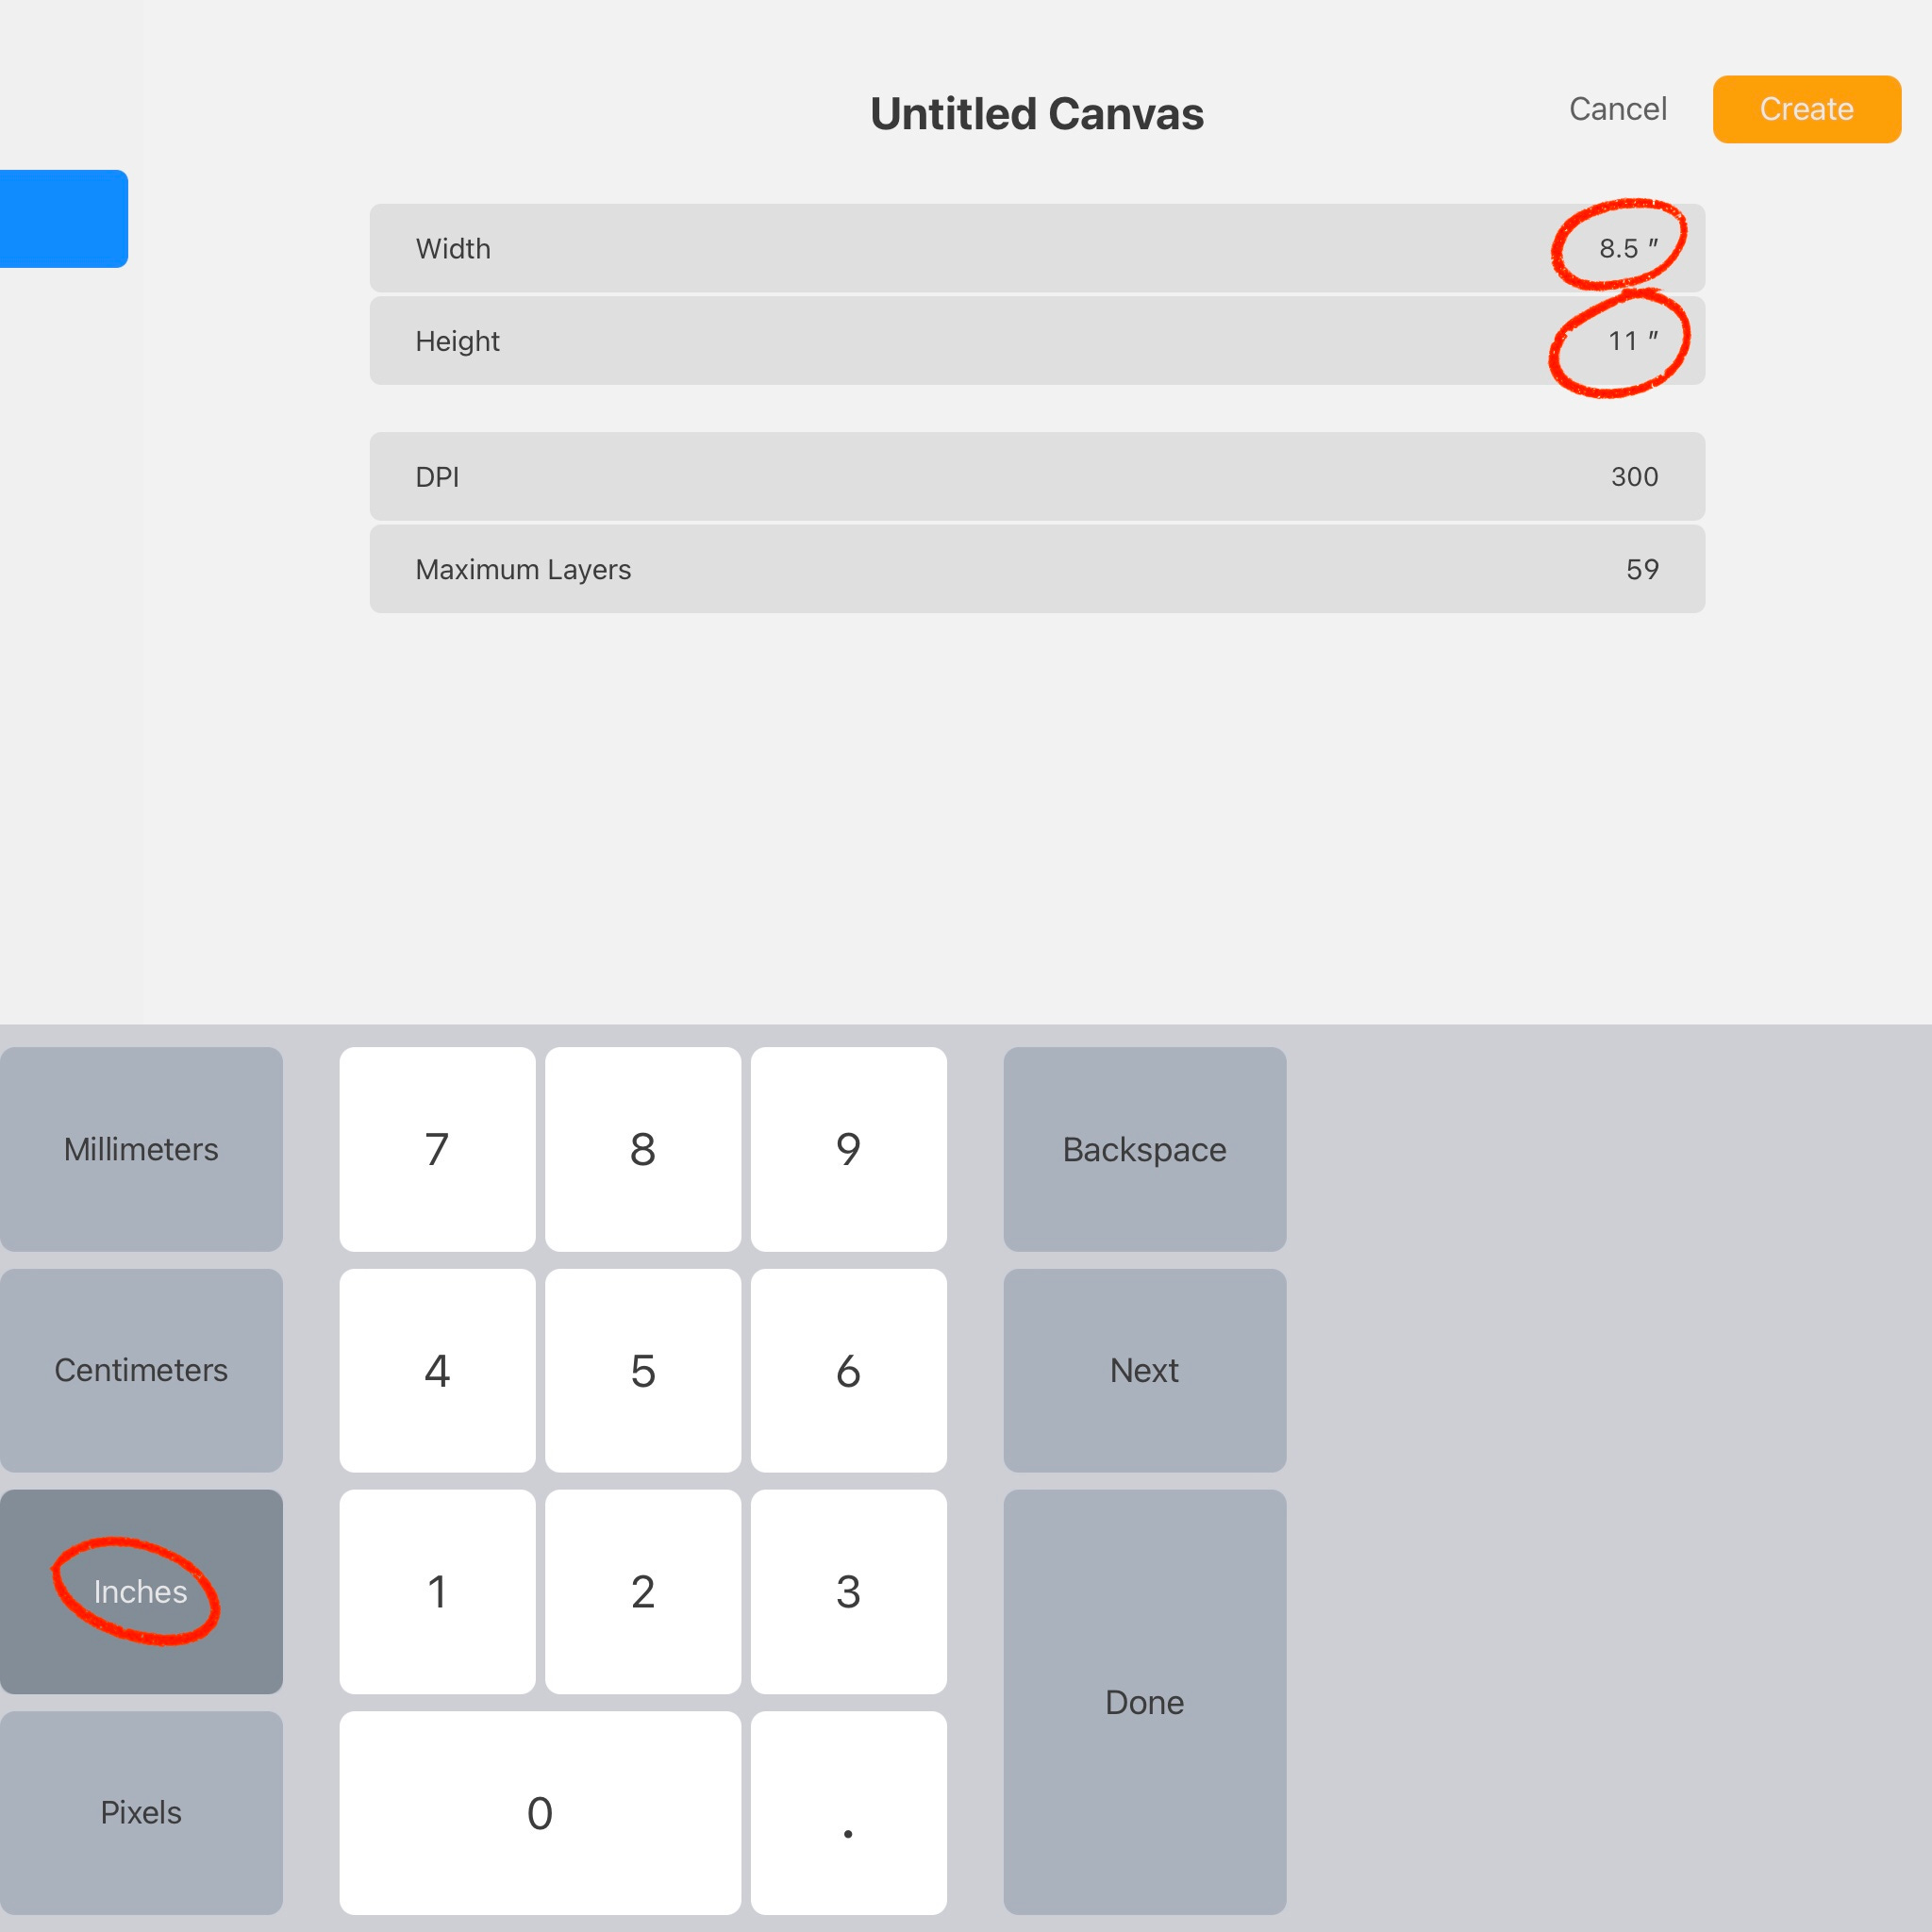
create a new document in procreate with those measurements

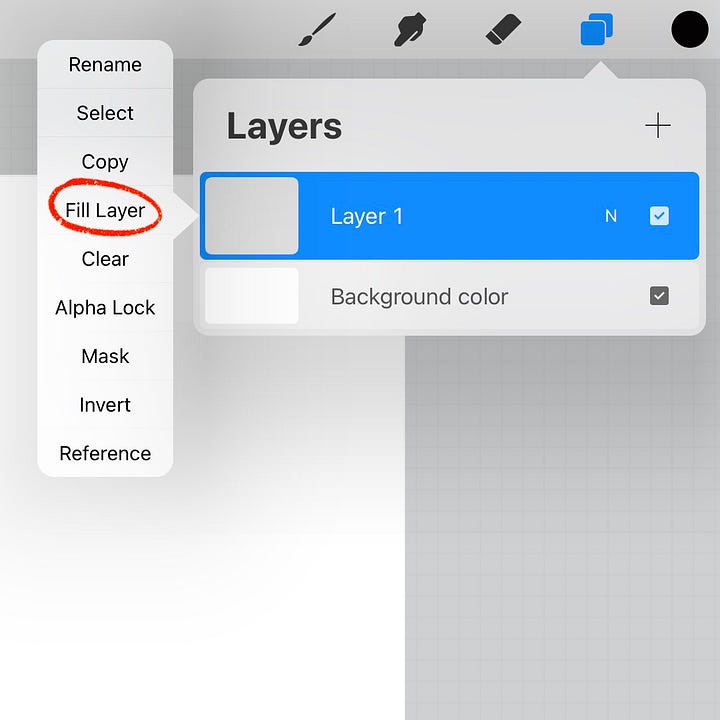
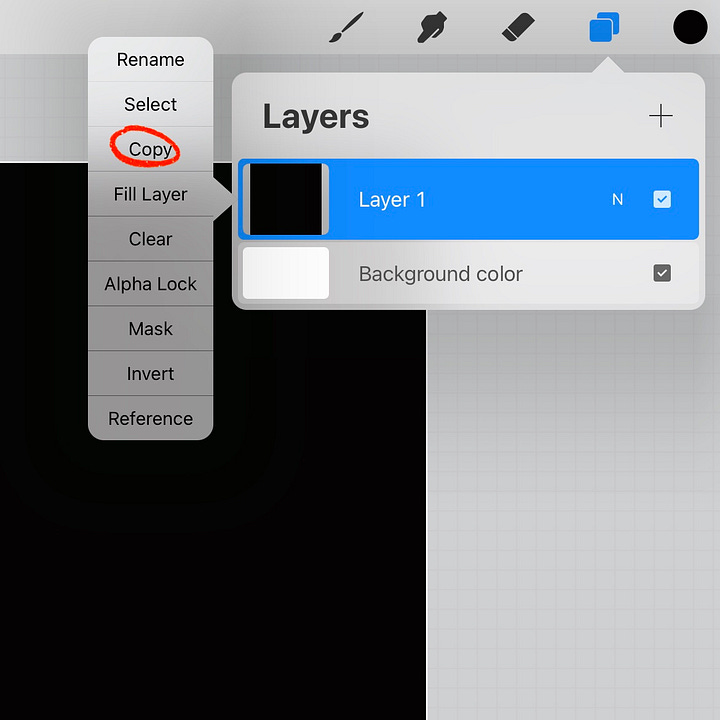
fill the first layer with any color. select the entire layer and copy
return to the procreate gallery and open a new file with printer paper dimensions (8.5” x 11”)

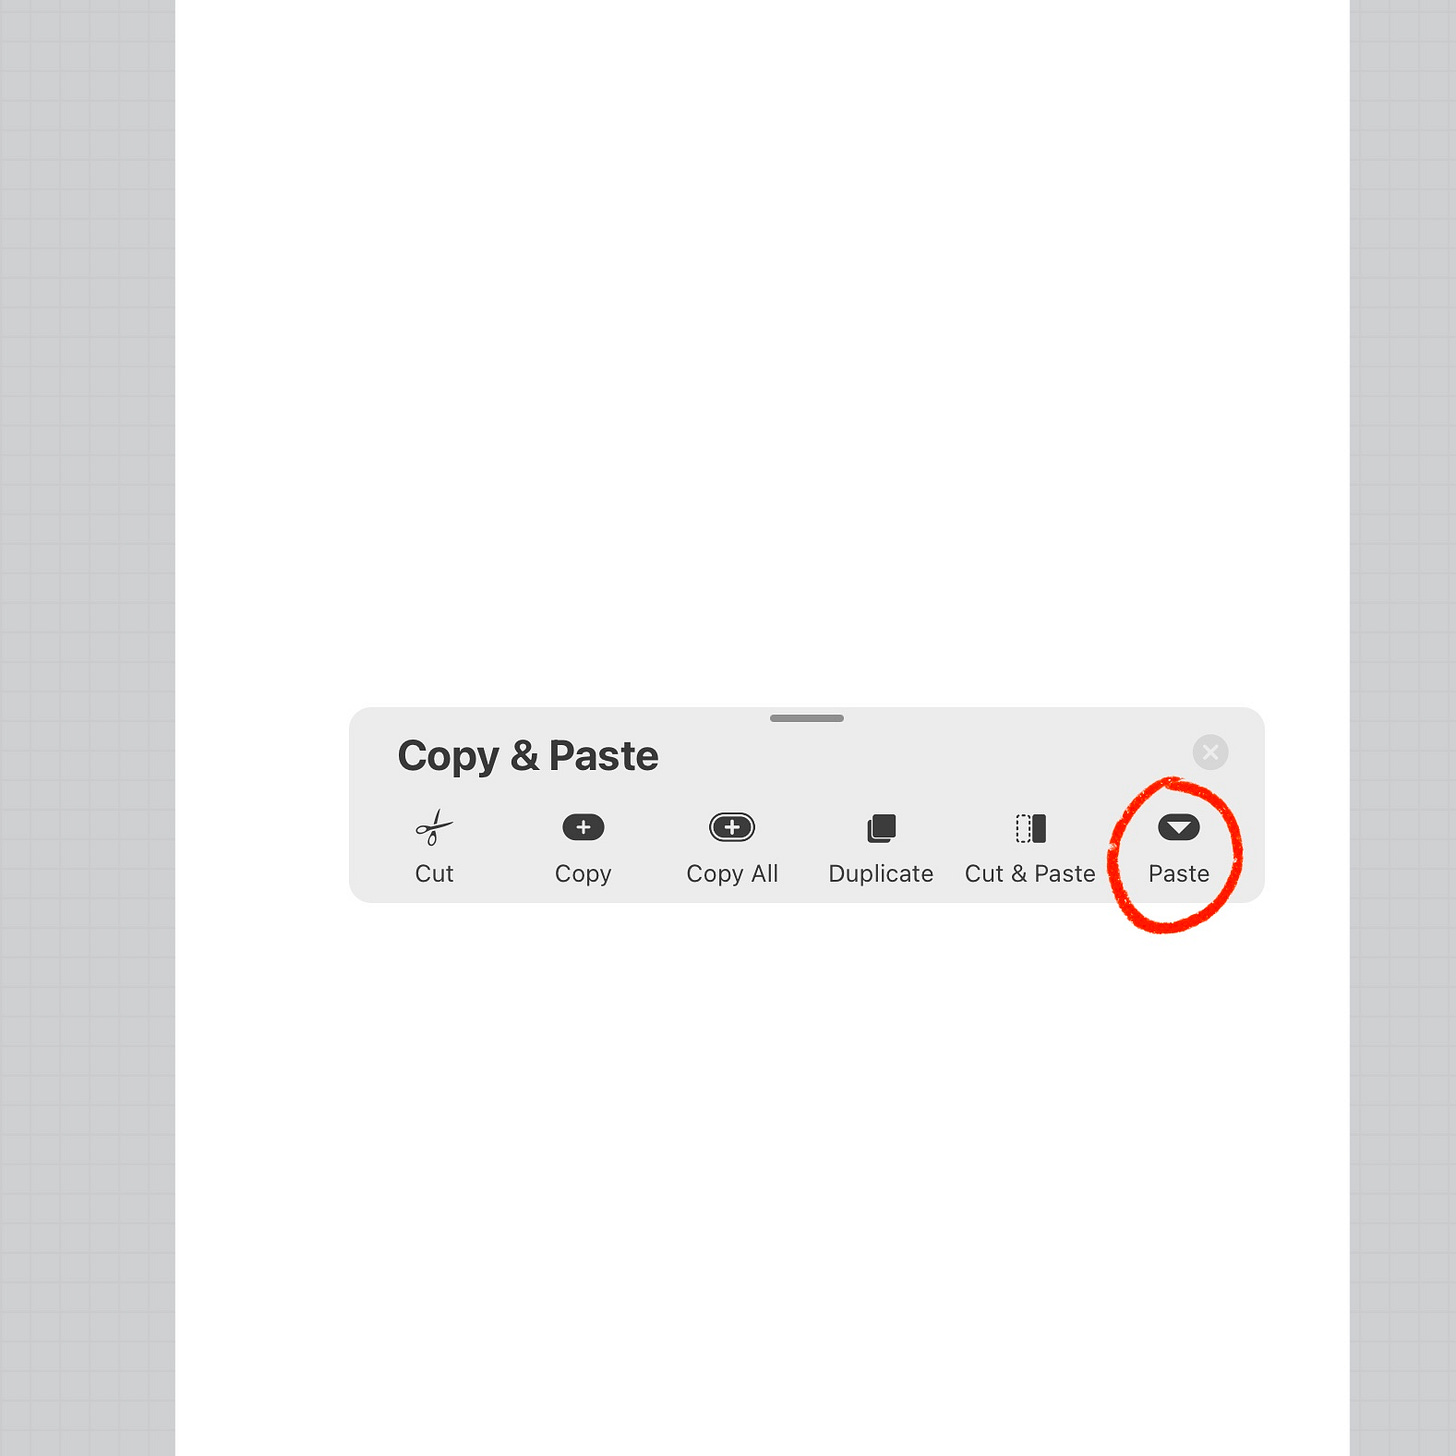
paste (swipe down with 3 fingers) the copied layer into the new document
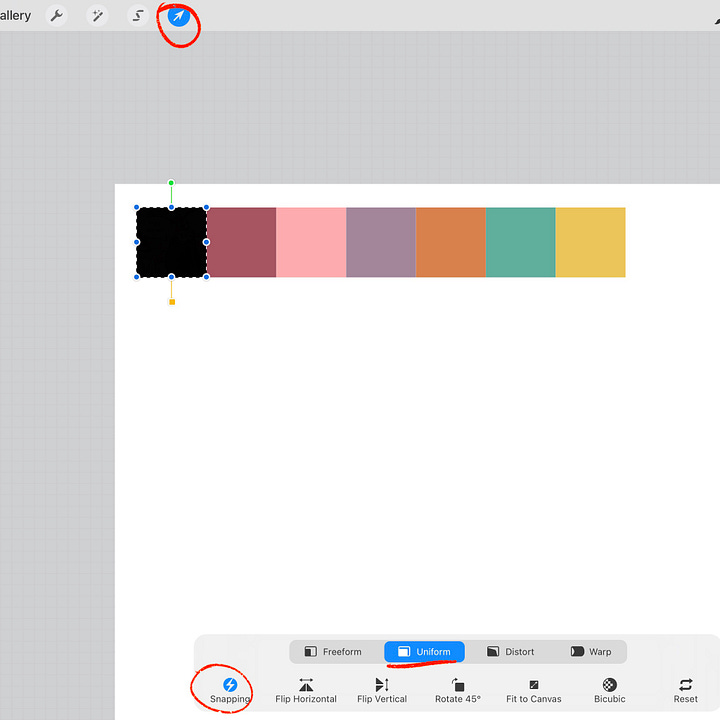
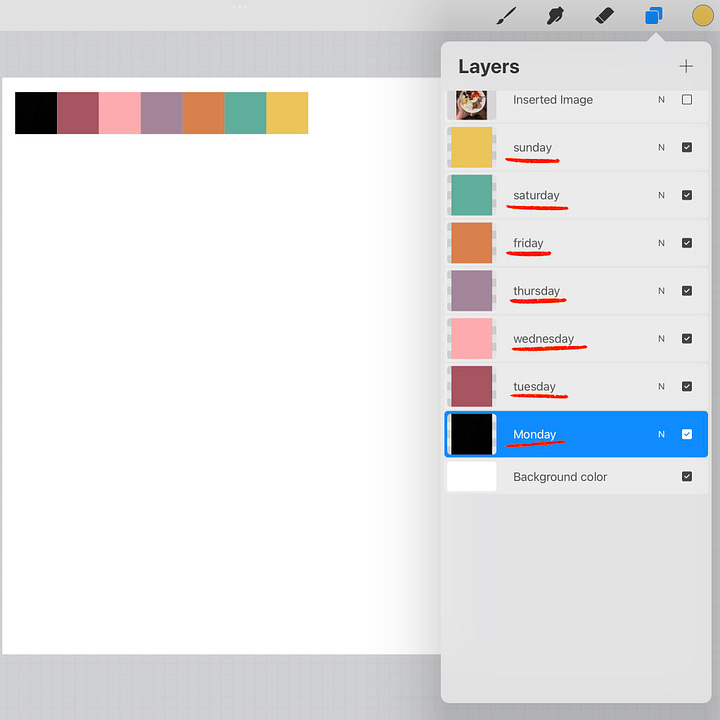
duplicate that box 6 times and space them out using the selection tool (uniform & snapping will help keep the boxes lined up) so you can see all the boxes. i renamed mine the days of the week so i can keep photos straight. i’ve changed the color of each box so it’s easier to visualize
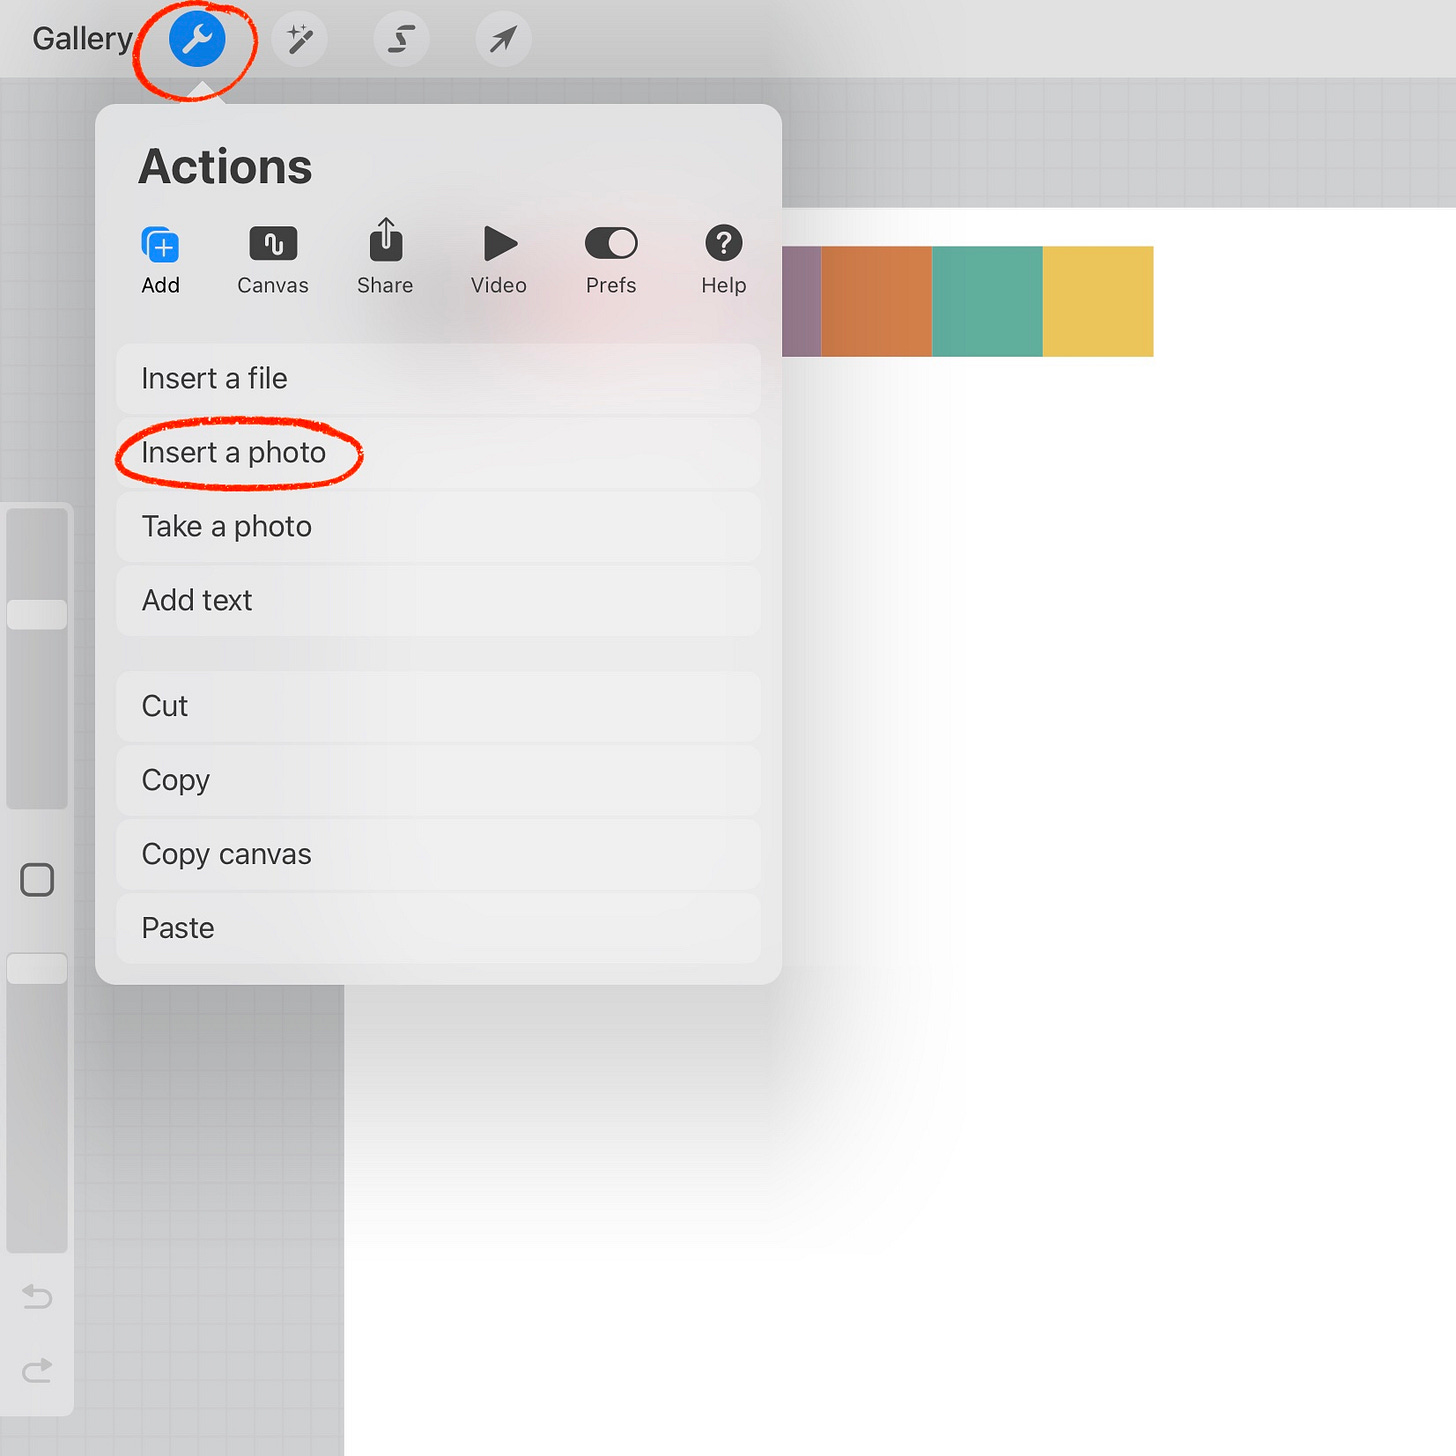
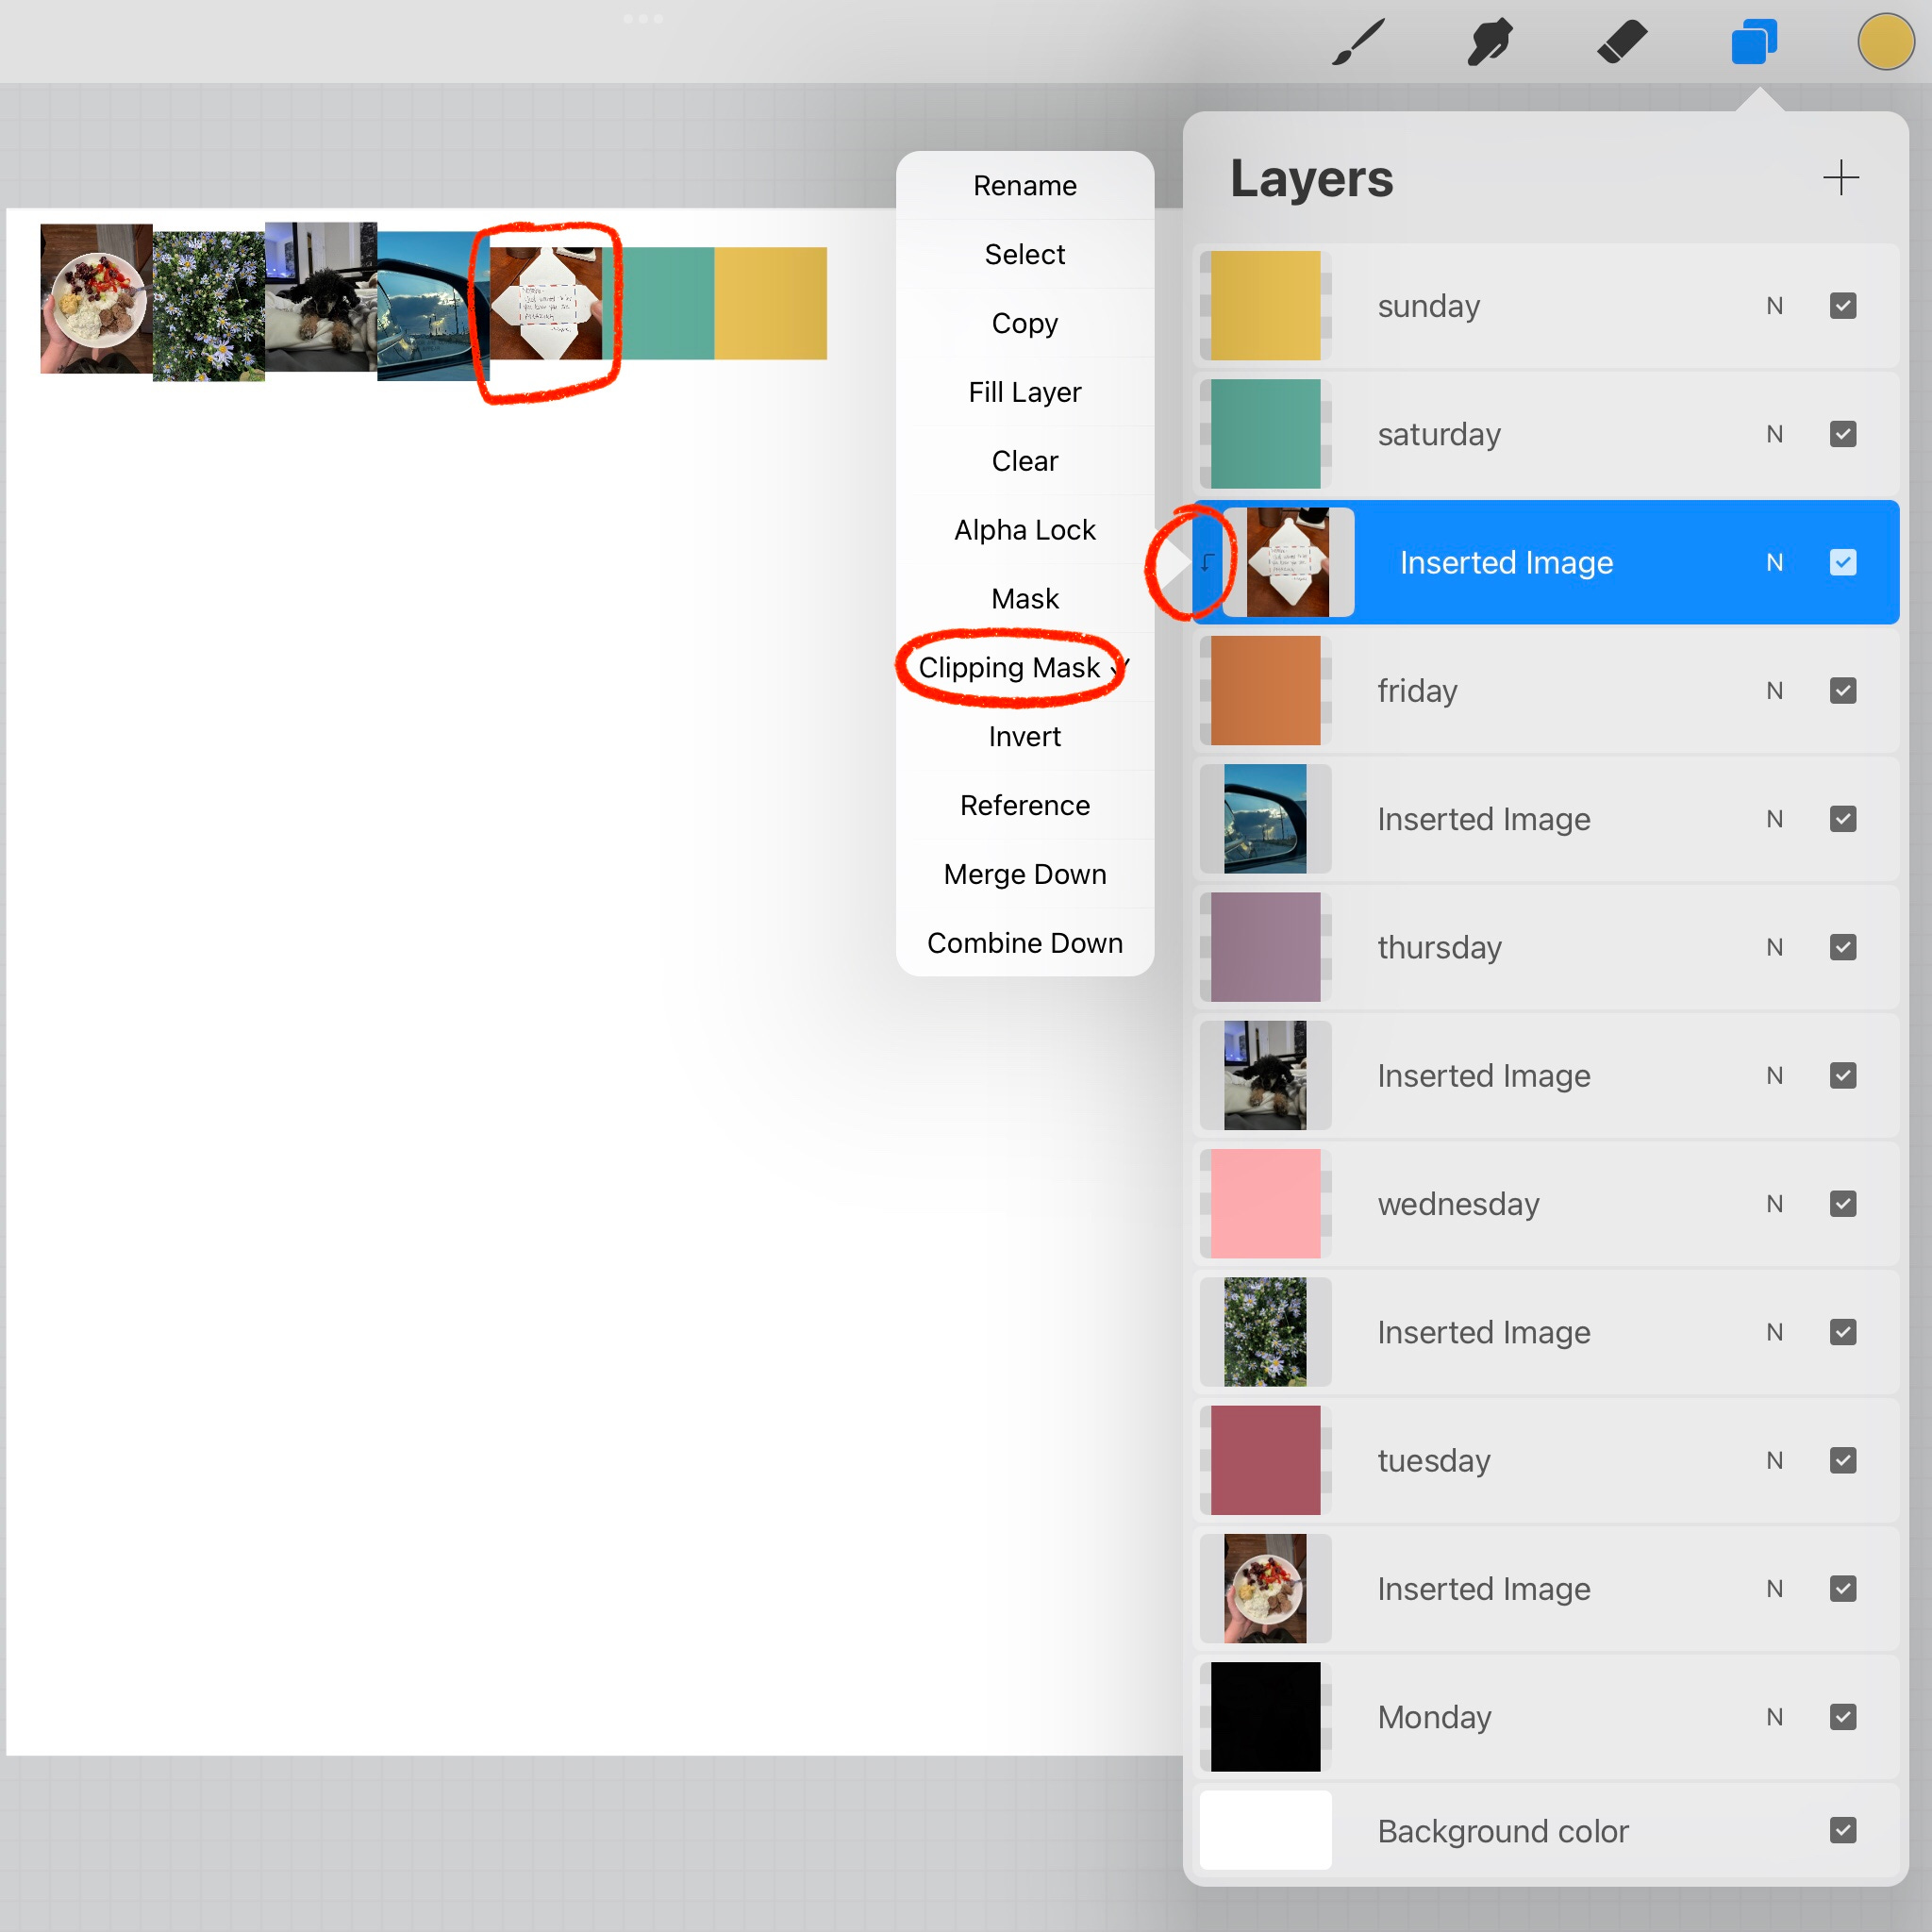
now you can insert photos from your library or copy from your iphone and paste into the file. make sure the photo is above the layer you want in the file and also in the layers list
in the photo layer, go to options and hit clipping mask. this will hide the parts of the photo that aren’t covered the box you made. after you’ve applied the clipping mask, you can still adjust the photo using the selector tool, if needed

once you have all your photos added, you can go into tools, share PDF. it’ll ask the quality and then you can scroll down and hit ‘print’

if you’ve used procreate before, you can add a layer and write comments over the picture if you want an explanation before you print - that’s what i do.


an alternative option:
you can also use Word to print photos. you will have to crop your photos to a square, add them to the document, right-click and click crop, then resize to the size you need (a6 hobonichi size is .75” x .75” and a5 hobonichi size is 1” x 1”). you’ll want to change wrap text to any of the options besides “in line with text” to get the photos side by side.
the simplest solution:
i don’t want to be a gatekeeper for this process. i don’t want this to feel unattainable - there are ways to do it yourself and make it work (that’s how i figured it out!), but i also understand some people don’t want to put the time or effort into figuring out something like procreate.
if you’re someone who wants a template i’ve made a super simple drag-and-drop one! it’s through Canva, so you will need to have an account to use it, but the good news is you can use it with a free account.
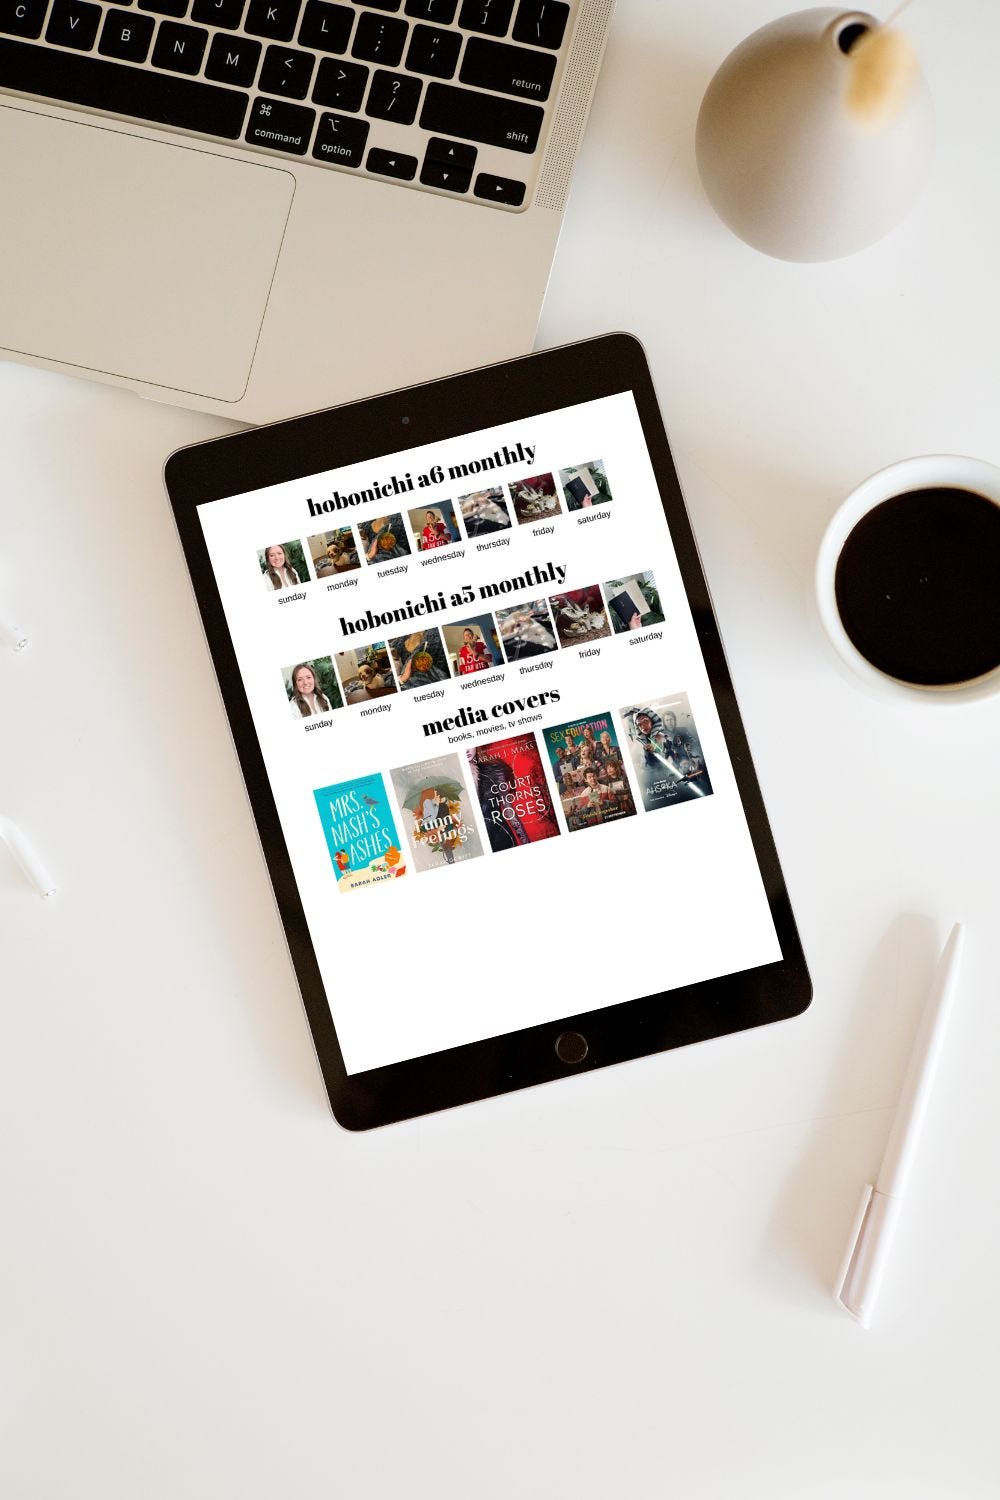
if you’re interested in it, here’s the listing! it’s a one time purchase of $7, includes photo sizes for a5 and a6 journals and comes with instructions for adding photos from your computer and phone. it also includes boxes for media covers - these are the same sizes that i use for my book covers in my hobonichi a6.
support me :)
if you’ve made it this far, THANK YOU SO MUCH! truly! i’m touched you’re allowing me to take up some of your time. if you enjoyed this newsletter and want to support me, you can:
click subscribe & tell your friends to subscribe
share a snippet on social media
forward this to a friend who you’d think would enjoy it
venmo (@natashainyourphone) a donation that’ll go towards a lil snackie to fuel other substacks
thanks again for being here!
natasha <3
Thanks for sharing! I've been trying to figure out how you did it. I know you've shared in stories but I forget by the time I think about it. I start the cousin in 2024, if I can't figure out how to do it I will def come back and get that template.
Hi! What's a good place to contact you for help? The template was so simple to use (thank you!), but I'm having trouble with the printing part. Thanks so much!